Personal tools
You are here: Home gvSIG Projects gvSIG Desktop Documentation User documentation gvSIG-Desktop 1.1. Manual de usuario.
gvSIG Desktop
gvSIG Desktop

Cached time 11/21/13 15:46:54 Clear cache and reload

 
Document Actions

gvSIG-Desktop 1.1. Manual de usuario.

by Grupo gvSIG last modified 2011-04-19 16:42

If you wish to add an orthophoto to gvSIG using the ECWP protocol, first open a view and click on the “Add layer” button.

anadir-una-capa-a-gvsig/anadir-ortofotos-a-traves-del-protocolo-ecwp.img/anyadirCapa_es.png

Click on the “Add” button in the dialogue box. A file browser window appears.

Choose the “gvSIG Image Driver” option from the “Files of type” pull-down menu.
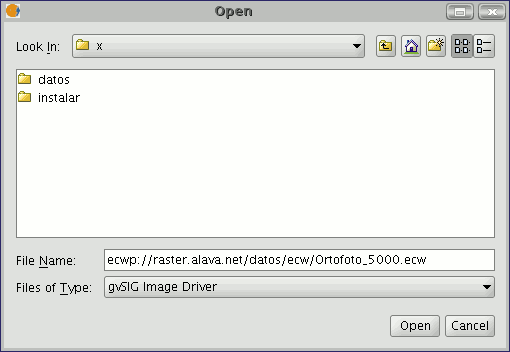
anadir-una-capa-a-gvsig/anadir-ortofotos-a-traves-del-protocolo-ecwp-en.img/abrirEcwp_en.png

Write the URL of the file you wish to load as follows in “File name”:

ecwp://server address/path of the file you wish to add.

For example:

ecwp://raster.alava.net/datos/ecw/Ortofoto_5000.ecw

ecwp://earthetc.com/images/geodetic/world/MOD09A1.interpol.cyl.retouched.topo.bathymetry.ecw

When you have input the data, click on “Open”.

The orthophoto will be added to the layer list.

anadir-una-capa-a-gvsig/anadir-ortofotos-a-traves-del-protocolo-ecwp-en.img/orto_5000_en.png

Select the new added layer and click on “Ok”.

The image will be added to the view.
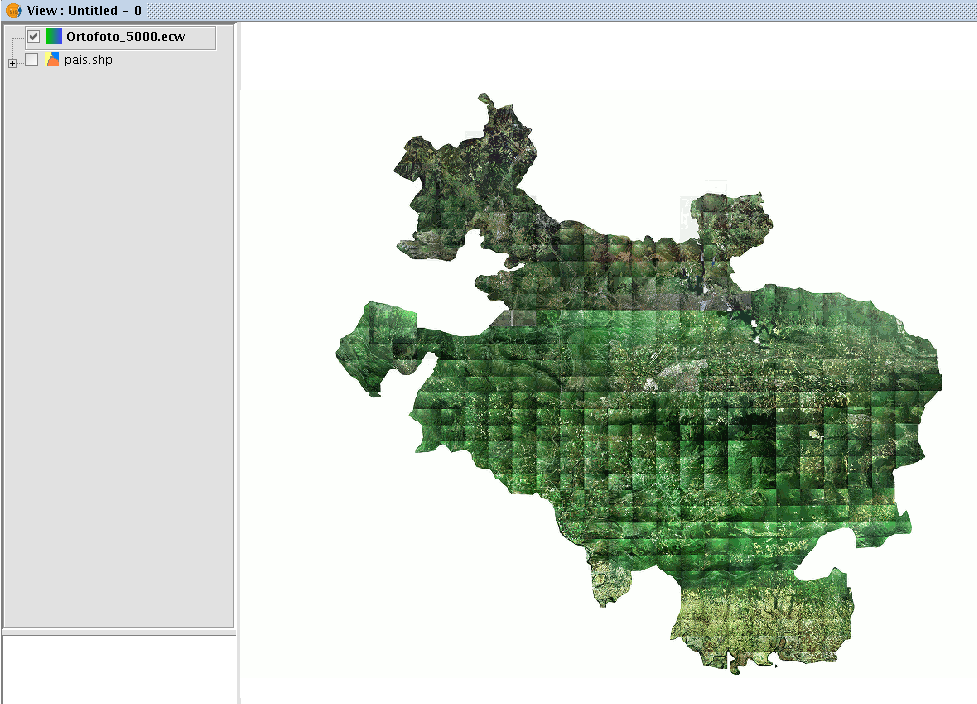
anadir-una-capa-a-gvsig/anadir-ortofotos-a-traves-del-protocolo-ecwp-en.img/ecmpEnLaVista_en.png
Get freemind document

View source document Get permanent link


Powered by Plone CMS, the Open Source Content Management System

This site conforms to the following standards: